Sunday 23 February 2014

Roast Hazelnut, Choc Chip & Sour Cherry Oat Cookies

Yesterday my parents came for a visit. We planned to go out for lunch but I wanted to bake us a little treat to have with afternoon tea when we got back to my flat. I settled on cookies. I haven’t baked a batch of cookies in ages, cake being my usual go-to treat but the cookies made a lovely change.

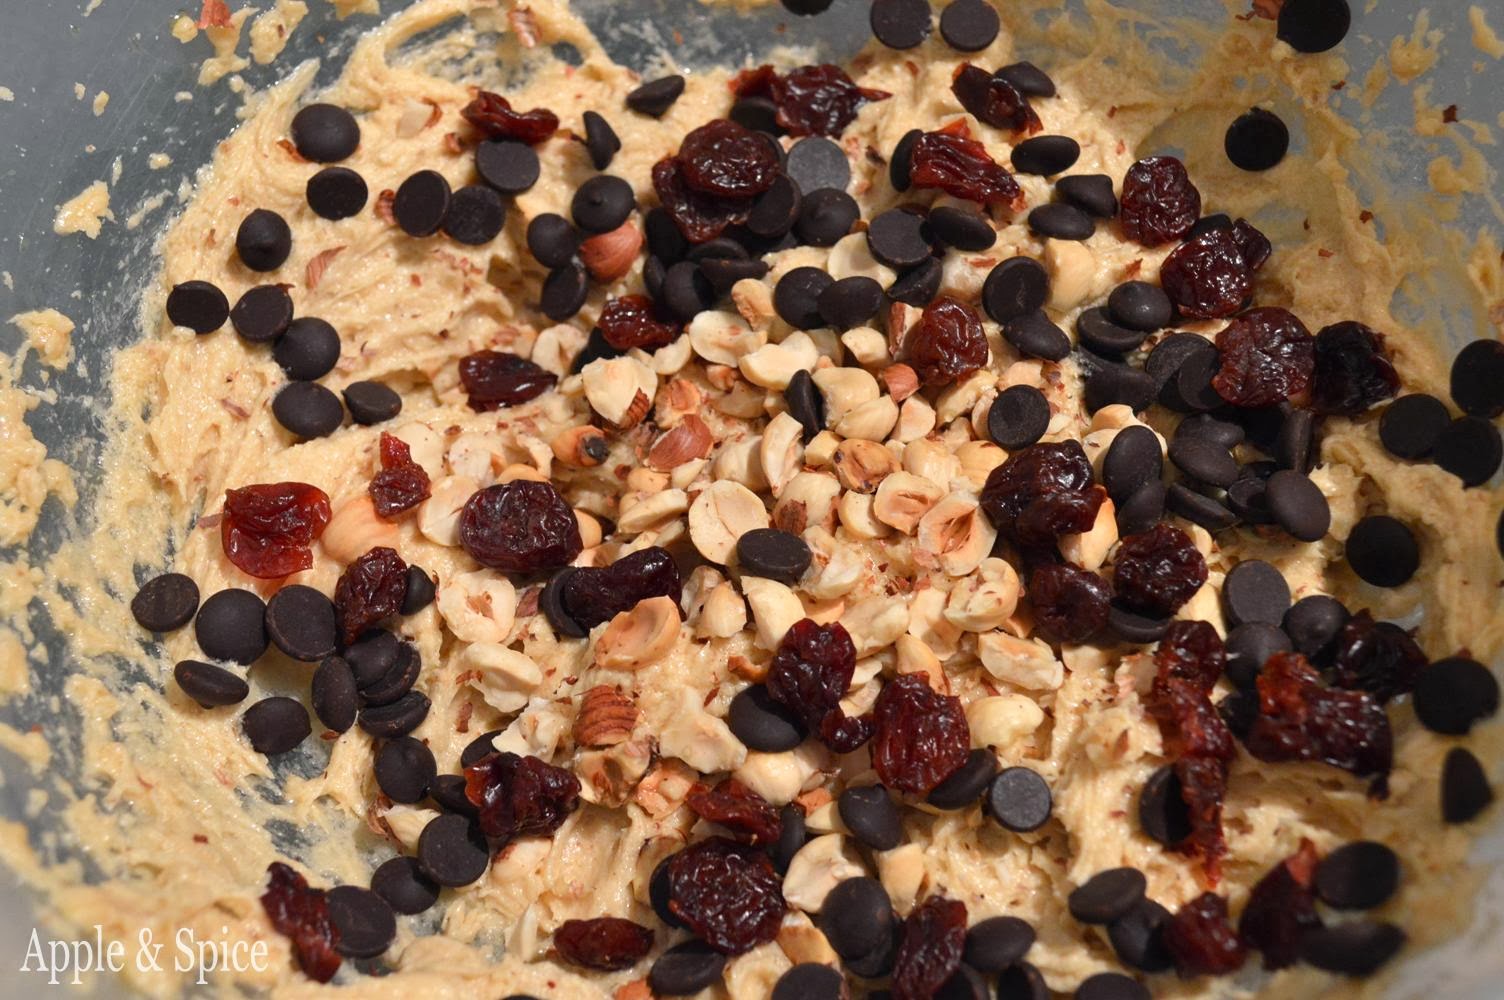
I’ve said it before but I’m a person who loves different textures in their foods. These cookies are no exception making use of wholesome oats (gluten free ones naturally), gooey dark chocolate chips, nuggets of roasted hazelnuts and chewy tart dried cherries. A delicious combination.

The cookies are quite thick and substantial, meaning they have a wonderfully crisp edge yet stay soft and slightly doughy in the middle, mmmm. The oats add a wholesome bite and flavour while the nuts add crunch and an intense nutty flavour when bitten into, even more so as I pre-roasted them. The chocolate chips stayed soft and melty, while giving an intense dark chocolate flavour which paired brilliantly against the sweet/tart chewy cherries. Every bite was slightly different and it made the cookies very moreish.

I used to make this type of cookie quite often but for some reason I haven’t made them in the past 2-3years! Now I’ve rediscovered them I’ll definitely be baking more soon.

You can of course add whatever add-ins you like. Cinnamon & raisins are classic, but crystallised ginger & lemon or cherry & flaked almonds also work brilliantly.

Roast Hazelnut, Chocolate & Sour Cherry Oat Cookies
Ingredients
150g butter
100g light soft brown sugar
70g caster sugar
1 egg
1 tsp vanilla extract
50g roasted hazelnuts, halved
50g dark chocolate chips
40g dried sour cherries
170g gluten free porridge oats
20g tapioca starch
135g rice flour
¾ tsp baking powder
¾ tsp bicarbonate soda

Method
Roast your hazelnuts in a 180C oven for 5-6 minutes until lightly toasted and golden brown, then set aside to cool (optional)
In a large bowl, cream the butter together with both the sugars until light and fluffy.
Add the egg and vanilla and beat until well combined. Stir in the hazelnuts, chocolate chips and sour cherries.
Add the oats, tapioca starch, rice flour, bicarbonate of soda and baking powder into the bowl and mix together using a spatula until all incorporated.
Using an ice cream scoop, scoop out balls of dough onto a baking tray. You can pack them close together for now.
Place the cookie balls into the fridge for chill for 20 minutes. Meanwhile preheat oven to 190C and line another baking tray with greaseproof paper.

Remove the cookie balls from the fridge and arrange half on them onto the new baking tray. Leave 2-3 inches between each one. Gently press the tops of the cookie dough balls down, to form thick flat round discs.
Bake in the oven for 12-15 minutes until golden brown at the edges and still slightly pale in the middle.
Cool on sheet for 1 minute before transferring to a rack with the help of a palette knife. Repeat with any leftover cookie balls.
Store in an airtight container for up to 1 week. They also freeze well.
Makes 15-16 cookies

Sunday 16 February 2014

Celebrating 7 Years of Apple & Spice with Apple & Hazelnut Upside Down Double Layer Cake

Today my blog turns 7. I can’t quite believe it. Each year I like to celebrate the occasion by making an apple themed bake. This year I was inspired by a cake combination of apple and hazelnuts.

My apple themed bakes from previous years are:
1st yearSpiced Apple Cake


4th yearFruity Tea Loaf


My apple and hazelnut cake consists of light layers of nutty cake made by replacing some of the flour with ground hazelnuts. This was baked in tins that had chunks of sautéed spiced apple placed in the base first. When the cakes are turned out the apple bases become the topping for each cake layer. This creates layers of hazelnut cake topped with apple which when stacked means one apple topping acts like a fruity filling along with some creamy ricotta, and the other cake creates an appley topping as decoration. A double layer upside down cake.

I chose to shell, roast, de-skin and grind my own hazelnuts as we had lots of hazelnuts in their shells leftover from Christmas. I’ve never roasted and ground my own hazelnuts before and the intense nutty aroma this process produced was intoxicating. I’d really recommend roasting and grinding your own if you can, the flavour was far superior to the pre-ground variety, so nutty and fresh tasting.

The apple for the base/topping was made with tangy Cox apples that I first softened slightly in a mix of butter, brown sugar and cinnamon. This created little chunks of sweet and spicy appley goodness that were delicious when baked into the hazelnut cake.

I debated using slices of apple rather than chunks, to create a more decorative topping when the cakes were turned out, but decided this would make the cake harder to cut neatly. I think I made the right decision in the end and I liked the chunks of apple, I think they added more flavour and texture than a thin slice would have done.

To fill my cake layers I used fresh ricotta that I lightly beat with a little maple syrup to sweeten it. This worked really well and kept the cake feeling light and delicate, as ricotta is no where near as rich as double cream. As it was lightly beaten it became smoother and creamier and many of my tasters didn’t realise it wasn’t cream until I told them. You couldn’t really taste the maple syrup, it just sweetened the ricotta slightly while still letting the hazelnuts and apple shine through.

My family loved the cake and it was devoured within a day. The combination of roasted hazelnuts, succulent apple and milky creamy ricotta was a delicious combination and kept the layers moist. It was the kind of cake you could eat for afternoon tea or as a dessert. (Sorry for the quality of the photos it was a very dark day).

Thank you to everyone who reads this blog or who writes blogs of their own. You are a great source of inspiration and new ideas. I’m sure most bloggers would agree with me that there are occasions were finding time to bake and blog can feel like a chore, but most of the time I delight in freedom of food creativity it allows me to explore.

Apple & Hazelnut Upside Down Double Layer Cake
Hazelnut Cake
60g hazelnuts, skin on
120g caster sugar
120g butter
80g gluten free plain flour
2 eggs
1 tsp baking powder

Sautéed Apples
4 x Cox apples (350g peeled, chopped weight)
15g butter
3 tsp light soft brown sugar
½ tsp cinnamon

Filling
150g ricotta
1½ tbsp maple syrup

Method
Preheat the oven to 180C.
Place the hazelnuts on a baking tray and roast in the oven for 8-9 minutes until the skins are tinged and they smell very nutty.
Remove from the oven and allow to cool for 10 minutes. Then rub the hazelnuts in a clean tea towel or sheets of kitchen paper to remove the skins. If sufficiently roasted, they should just flake off easily.
Grind the hazelnuts in a coffee grinder or small food processor and set aside.

To make the apple, peel, core and dice the apples into 1-2cm pieces.
Heat the butter in a frying pan and add the apples. Allow to cook for 8-10 minutes until just starting to soften. Sprinkle over the sugar and cinnamon and cook for a further 1 minute until the sugar has dissolved to form a light caramel with the juices from the apple. Set aside.

Line the base of 2 x 6inch cake tins with greaseproof paper. If not still on, heat the oven to 180C. Divide the sautéed apple between the bases of each cake tin.
To make the cake, make sure your butter is soft and then beat it together with the sugar until it is pale and creamy. Add the eggs one at a time, beating in well. Scatter the flour, baking powder and hazelnuts over the top of the cake and mix until combined.
Divide the cake batter into the tins, spreading it carefully over the top of the apple chunks. It’s easiest to do this by blobbing on small spoonfuls and spread it out gently. It may look like there isn’t enough sponge mix, but it puffs up in the oven.
Bake the cakes for 20-25 minutes until risen and gently springy to the touch.
Leave to cool in the tins for 10 minutes before running a knife around the edge and turning out. Leave the cakes to cool upside down, with the apple facing up.

To assemble, use a spatula to beat the ricotta with the maple syrup until it becomes smoother and creamy. (It will still look slightly granular, this is fine)
Place one cake layer on a serving plate, apple side up. Spread over the ricotta and top with the second cake layer, also apple side up.
Allow to chill in the fridge for 30 minutes before dusting lightly with icing sugar and serving.
Store any leftovers in the fridge and due to the moistness from the apple and ricotta, its best to eat within 2 days.

Makes 1 x 6inch cake.

Monday 10 February 2014

Indulgent Love-By-Chocolate Chocolate Cake with Dark Chocolate Ganache

I’m not normally the type of person who craves chocolate, and when I do eat chocolate it’s got to be dark. Cake, rice pudding or cereal are usually my comfort foods of choice. However, there are exceptions to the rule. These past few weeks have been really busy at work and what with it being the run up to Valentines Day I keep seeing blog posts full of indulgent looking chocolate based desserts with the result that by the time Friday rolled round I was more than ready for some full on chocolate indulgence. The richer and darker the better.

After a quick internet search I happened upon a cake recipe by a chef called Ed Kasky that had literally hundreds of rave reviews. It looked so deep, dark and chocolaty that I knew I had found my chocolate treat. The recipe made a colossal 10inch double layer cake, which even in my chocolate craved state was too much for me. I decided to make a daintier 6inch cake instead. The recipe called for 3 eggs and I pondered dividing everything by a third and using only 1 egg, but this seemed stingy and so instead went for using 1½ eggs. I know this isn’t ideal but you can simply add the remaining half egg to more eggs to bulk up an omlette or make some fried rice etc. 


Making the batter I could tell the cake was going to be a good one. Oil, buttermilk and hot coffee are used in place of butter, and both melted chocolate and a large amount of cocoa powder are used for chocolate flavour. This produced one very rich chocolaty cake batter that was of pouring consistency. The cake is also baked at a very low temperature, meaning it almost sets in the oven rather than bakes, creating a completely soft cake without a top crust, I could tell it was going to be a lovely moist cake. 


Using 1½ egg recipe produced a large amount of batter and I ended up filling 2 x 6inch tins and a spare ceramic dish with the batter. Despite using 3 dishes, the batter still rose in the oven and overflowed the sides of the tins, falling onto the oven base. Well darn, I should have stuck with my original thought of only using 1 egg. I think I made enough batter to fill 2 x 8inch tins. 


Despite a bit of baking mishap, after trimming off the overflowed bits and neatening the edges, the cake was spectacular! It was light, airy and wonderfully moist. It was a little soft and fragile at first, but firmed up a bit on cooling. Due to the large amount of batter it produced 2 very tall layers which were decadently filled and topped with a glossy dark chocolate ganache for extra indulgence.

The cake was fantastically light and almost moussy when I first ate it. The middle layer of ganache melding with the soft moist cake layers to make one delectable mouthful. The cake was sweet with a rich, slightly sticky gooey chocolate cake flavour. You don’t taste the added coffee in the cake, it just seems to deepen the chocolate flavour and make it seem even more grown up and indulgent. Oh, this was the chocolate cake of all chocolate cakes!

The smooth, creamy dark ganache worked perfectly with the cake, it really felt special and treat-worthy. In a nod to Valentines Day I decorated it simply with a sprinkle of red sugar hearts. Perfect for sharing with a loved one. I can’t wait to make it again and use 2 x 8inch tins instead. I’ll give my recipe below using 1½ eggs, but I’ll say to bake it in 8inch tins, as 6inch are far too small.

If you’re going to give in to a chocolate craving, then you might as well dive in head first and bake this wickedly indulgent sensational chocolate cake! It really is death by chocolate, but as it’s nearly Valentines, I’ve taken a bit of poetic license and called it Love-By-Chocolate instead J

Here a link to the original recipe, that I halved and adapted to make it gluten free (below).

Indulgent Love-By-Chocolate Chocolate Cake with Dark Chocolate Ganache
Chocolate Cake
40g dark chocolate
170ml hot brewed coffee
275g caster sugar
*120g rice flour
*20g cornflour
*10g tapioca starch
¾ tsp xanthan gum
50g cocoa powder
1 tsp bicarbonate of soda
½ tsp baking powder
½ tsp salt
1½ eggs
85ml vegetable oil
165ml buttermilk
½ tsp vanilla extract
*(Alternatively use 150g of your favourite gluten free plain flour)

Dark Chocolate Ganache
300g dark chocolate 60-70% cocoa
180ml double cream
40g butter

Method - Cake
Preheat the oven to 150C and grease and line the base of 2 x 8inch tins.
Finely chop the 40g chocolate and add to a small bowl with hot coffee. Let mixture stand, stirring occasionally, until chocolate is melted and mixture is smooth. Set aside.
In a jug, measure out the oil, buttermilk and vanilla, set aside.
Into a large bowl sift together sugar, gluten free flours, cocoa powder, bicarbonate of soda, baking powder, salt and xanthan gum.
In another large bowl beat the eggs with an electric mixer until thickened slightly and pale creamy coloured, around 3 minutes.
Combine the coffee mixture to the buttermilk mixture in the jug and then slowly add the liquids into the whisked egg mixture, whisking slowly all the time. Don’t worry if there is some solidified chocolate bits left behind, just add these in too.
Add the flour mixture a third at a time, beating gently between each third until just combined.
Divide the batter between the tins and bake in middle of oven until a tester inserted in center comes out clean, around 50mins – 1hr 5mins.
Place the cake, still in the tins on a cooling rack and leave to cool completely in the tins. Do not remove when still warm or else they will collapse.
Once cool, run a knife around the edge and carefully turn out. Place on cake on a serving plate, spread with half the ganache and top with the remaining cake layer. Spread the remaining ganache over the top of the cake and decorate as desired.
Allow to set for 30 minutes before serving.
Store any leftover cake in the fridge, wrapped in clingfilm.

Dark Chocolate Ganache
Break the chocolate into pieces and set aside.
Heat the cream in a saucepan until just beginning to simmer, but don’t let it boil.
Remove the pan from the heat, add the chocolate, stir once and leave for 3 minutes to allow the chocolate to melt. Then stir gently until the cream and chocolate are combined into a glossy mass.
Cut the butter into small pieces and stir into the chocolate.

Allow to cool until of a spreadable consistency but still soft and glossy, around 10 minutes. Use the ganache to fill and decorate the cake layers.

Sunday 9 February 2014

Fragata Olives Giveaway Winner!

There were 8 entries to the giveaway and the random, computer generated winning number of the Fragata olives competition was….comment number 1
Congratulations Kate D!

Kate said:
“My favourite olives are either stuffed with Feta or marinated in herbs..... eaten by the sea in the harbour on a warm summers day, straight from the olive stall with a cocktail stick!”
Sounds a delightful way to enjoy some olives Kate. I’ll be contacting you shortly for your delivery address. Let’s hope we get some sunshine soon so we can all enjoy some al fresco olive eating!


Thank you to everyone who entered and to Fragata for letting me run the giveaway.

Sunday 2 February 2014

Green Olive, Garlic & Rosemary Pancakes and a Giveaway

I was recently gifted a lovely selection of olives from Fragata. Some black, some green and some stuffed with garlic. There was also a jar of hot peppers which I am longing to try out with some houmous and falafels. Fragata specialise in Spanish olives and other mediterranean products. 

I love olives, in sandwiches, on pizza, or munched on their own, but rather than just eating them in their natural form, I wanted to try something a little different. After a short ponder between scones, muffins or pancakes, I settled on pancakes. Having pancakes for a lunch is a weekend treat of mine that I hadn’t yet done this year, so pancakes it was to be. I usually make sweet pancakes, so the idea of savoury salty olive pancakes intrigued me.

The green olives stuffed with garlic sounded particularly good and I decided to pair it with fresh rosemary as olive, garlic and rosemary sounded a great flavour combination. I made the batter for the pancakes using brown rice and chickpea flour, the latter having a very savoury taste and slightly dense texture. This seemed fitting for savoury pancakes and I thought its earthy flavour would be lifted by the salty tang from the olives.

To accompany my pancakes I wanted something light and fresh and went with a fresh milky ricotta cheese that I flavoured with fresh rosemary and lemon zest. This worked really well, its light fresh flavour adding a delicious contrast to the savoury salty pancakes. 

I loved the flavour the green olives gave to the pancakes. Unless you look closely you can’t really tell they are there, as they hide camouflaged in the batter, but when you bite into one, a sharp salty tang and that wonderful fresh olive flavour fills your mouth in a most satisfying way. The garlic wasn’t too pungent (as I feared it might be) and gave a subtle hint of flavour. The ricotta then neutralises the saltiness from the olive, getting you ready for the next bite. Simply delicious. 

Giveaway
The lovely people at Fragata are also offering one of you the change to win a sample of some of their products. All you have to do is leave a comment telling me what your favourite olive is and how you like to eat them. Competition open to UK residents only. Only one entry per person. Competition closes at midnight on Saturday 8th February. The winner will be chosen at random. Please leave a way for me to contact you should you win. Good luck!

Green Olive, Garlic & Rosemary Pancakes and a Giveaway
Ingredients
50g chickpea/gram/besan flour
30g brown rice flour
1 tsp baking powder
115ml milk
10 garlic stuffed green olives
10 leaves fresh rosemary
¼ tsp dried oregano
Freshly ground pepper
1 tbsp oil

To Serve
100g ricotta
Zest of ¼ lemon
7 leaves fresh rosemary
6 cherry tomatoes

Method
Preheat the oven to 180C. Cut the tomatoes in half and place cut side up on a foil lined baking tray. Bake in the oven for 15 minutes. Then turn off the oven and place two serving plates into the oven to warm. Also put in another place topped with a sheet of kitchen roll to hold the pancakes and keep them warm as you make them.
Spoon the ricotta into a small bowl and add the lemon zest. Finely chop the rosemary, add to the ricotta and mix together well. Store in the fridge until required.

To make the pancakes, weigh the flours and baking powder into a bowl and mix together. Chop the rosemary and add to the flour along with the oregano and a few twists of black pepper. Don’t add salt as the olives are salty enough.
Slowly add the milk, whisking well to remove any small lumps of flour. You should end up with quite a thick batter.
Chop the olives into rounds so you have a ring of olive filled with a small piece of garlic in each slice. Fold the olives into the batter.
Heat the oil in a large pan. Drop level tablespoonfuls of the batter into the pan, trying to get a few bits of olive in each one. (It’s best to do this in small batches) Cook for 1 minute before flipping over and cooking on the other side until lightly golden brown. Remove the pancakes from the pan and transfer them to the plate lined with kitchen roll that’s keeping warm in the oven. Repeat with the leftover batter. You should get around 6 pancakes from the mix.

To serve, divide the pancakes between the two serving plates. Place a couple of spoonfuls of the herby ricotta onto each plate, you can quenelle them by shaping it between two spoons if you want to be fancy. Scatter around some of the roasted tomatoes and finish with a little fresh sprinkling of lemon zest and rosemary if desired.
Eat and enjoy. Makes 6 pancakes
Serves 2 as a light lunch, or mini ones could be used as canapés. 
Note: Fragata did not pay me for reviewing their products and I was under no obligation to give them a positive review. These thoughts and comments are my own.