Friday 30 March 2007

Easter Bars

I decided to make a few chocolate cakes to give to Chris for Easter. He is a complete chocoholic and so I wanted to make these bars as chocolaty as possible. I made a basic chocolate sponge mixture and then added some white chocolate that I had chopped into tiny pieces. I decided to bake the cakes in small silicone bar moulds that a friend has lent me. They make great single serving cakes, which are easy to hold and bite into. Plus, it means you are free to experiment with the toppings compared to if you had make one large standard cake. If you do not have bar moulds I am sure that fairy cakes or muffins would work just as well.

After baking the bars, I made two different toppings with which to ice them. One was a chocolate fudge and the other was melted mint chocolate with an icing feather effect. I was really pleased with how the cakes turned out, light and fluffy and very easy to release from the mould thanks to the flexibility of the silicone.

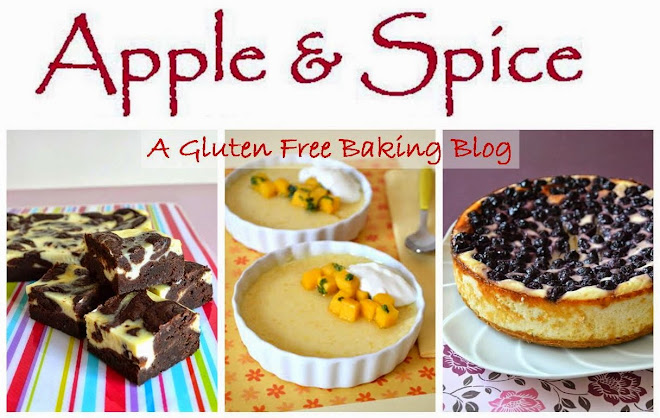
White Choc Chip Chocolate Bars

Ingredients
90g self raising flour
20g cocoa powder
110g caster sugar
110g butter or margarine
2 eggs
1 tsp baking powder
½ tbsp milk
35g white chocolate

Method
Preheat the oven to 165C. Place two silicone bar moulds onto a baking tray and set to one side.
Place all of the ingredients (except the milk and white chocolate) into a mixing bowl and beat with an electric whisk until combined.
Add the milk and beat until light and fluffy.
Chop up the white chocolate into little pieces and gently fold into the cake batter.
Using a teaspoon, drop two spoonfuls of mixture into each cavity of the mould and gently smooth out. You want the mixture to fill just over half of each cavity.
Bake them in the oven for 20 minutes until risen and firm when pressed in the centre.
Allow to cool for 5 minutes before releasing from the moulds and allowing to cool on a cooling wrack.
Decorate with chosen toppings and eat!
Makes 16 cake bars.


Chocolate Fudge Topping
This topping is a thick, sticky chocolaty mixture that is very addictive.
Ingredients
50g dark chocolate
20g butter
1 tbsp milk
2 tbsp icing sugar

Method
Break the chocolate into pieces and place it into a small microwavable bowl along with the butter and milk.
Heat in the microwave until melted and smooth.
Sieve in the icing sugar and beat with a spatula until thick and glossy.
Spread thickly over the cakes whist still warm and allow to set before eating.
Makes enough icing to cover 8-9 cakes.


Mint Chocolate and Feather Effect Topping
The addition of mint to this topping adds an interesting twist to the cakes but is not so strong as to overpower the taste of the chocolate. Adding an icing feather effect on top makes them that little bit more attractive but it is rather fiddly and they would taste just as good without it. I used a few squares of left over lindt mint chocolate that I had in the cupboard but I am sure adding a few drops of peppermint extract to plain chocolate would work just as well.
Ingredients
40g mint chocolate
½ tbsp water
3 tbsp icing sugar

Method
Mix the icing sugar and water together until smooth and fairy thick. You may need to add a little extra water or icing sugar to get the right consistency.
Pour the icing into a piping bag complete with a small round nozzle.
Melt the chocolate in a small microwavable bowl until molten.
Spread the melted chocolate over the cakes and immediately pipe thin lines of icing going horizontally across the cakes.
Using a cocktail stick or thin skewer drag the tip vertically through the chocolate and icing.
Make three drags for each cake, alternating the direction of ‘up’ or ‘down’ to create the feather effect. Leave to dry.Makes enough icing to cover 8 cakes.

Sunday 25 March 2007

Quiche or Tart?

I am just about to start my last week of uni before heading home for the Easter holidays. Looking through my cupboards at lunchtime I realised I had a large amount of red onions and eggs that would need using up before I left. The first thing that came to mind was a quiche. After a short rummage I unearthed some sweetcorn which I thought would look very pretty alongside the red onions and so I set to work.

The pastry was very easy to work with, although it was rather a nuisance to get out of the tin once cooked. However, I didn’t grease the tin beforehand which is probably the reason. I will have to remember to do that next time. In the end I have decided to label this as a tart rather than a quiche as in my opinion a quiche should lots of eggy mixture surrounding vegetables and a tart is lots of vegetables stuck together with eggy mixture and mine is the latter. (Confused yet?)

The tart has a naturally sweet flavour due to the red onions and sweetcorn which go well with the crisp pastry and smooth eggy filling. On cooling, the red onions turned almost the dark blue colour of blueberries, which looked very pretty next to the bright yellow of the sweetcorn. I think it could have done with a little more thyme as it only gave a very subtle flavour. Next time I will try to get hold of some fresh thyme.

I love baking the straggly shaped left over pastry on the baking tray along side the tart case. Mum always used to let us do this with any leftover pastry she had and it always brings back fond memories. They are great to nibble on when hot out of the oven, dusted with a sprinkling or sugar or spread with a little jam.

Red Onion and Sweetcorn Tart
For the pastry
130g plain flour
55g butter
Pinch of salt
1½ tbsp cold water

For the filling
400g red onions
75g Sweetcorn
2 tsp vegetable oil
2 eggs
120ml milk
1 tsp dried thyme
Pepper and salt for seasoning

Method
Sieve the flour and salt into a bowl and add the butter. Using a round bladed knife, work the butter into the flour using a cutting action.
When the butter is evenly distributed through the flour, rub the mixture together using the tips of your fingers until it resembles fine breadcrumbs.
Add the cold water a little at a time and work it in using the knife. Then form the mixture into a dough using your hands.
Form into a ball, wrap in cling film and place in the fridge for 30 minutes.
Meanwhile, prepare the filling. Chop the onions in half and then shred them into strips.
Heat the oil in a large frying pan and add the onions and thyme. Cook over a fairly high heat until soft, sticky and sweet. Around 10 minutes.
Pre heat the oven to 180C. Remove the pastry from the fridge and roll it out on a lightly floured surface until around 3mm thick. Carefully place into a 9inch fluted tin.
Roll the rolling pin over the top of the tin to remove any excess pastry. Then go round the edge of the tin pressing the pastry so that it rises slightly above the rim.
Prick the base with a sharp knife and place on a baking tray in the oven for 15 minutes.
Measure out the milk into a jug and add the eggs, pepper and sweetcorn. Whisk together until combined.
Remove the pastry case form the oven and brush the inside with a little of the beaten egg mixture and return it to the oven for a further 5 minutes.
Take the pastry case out of the oven and add the fried onions over the base. Carefully pour over the egg and sweetcorn mixture. Place in the oven and leave to cook for 30 minutes until set and lightly golden brown.
Allow to cool or serve whilst still warm.

Serves 6-8 people depending on appetite.

Saturday 24 March 2007

Chinese Style Lettuce Wraps

I decided to make these lettuce wraps with the leftover vegetables I had in the fridge from a stir fry I made a few nights ago. I have had something similar in a Chinese restaurant once, they were the vegetarians alternative to the crispy duck pancakes. These take literally less than 5 minutes to make and taste very fresh and crisp. The recipe could of course be adapted to fit whatever vegetables you had lying around and any kind of dipping sauce would do in place of the chili sauce.

Chinese Lettuce Wraps
Ingredients
Beansprouts
¼ carrot
½ Pak Choi
1 spring onion
2 mushrooms
1 tsp soy sauce
1 tsp vegetable oil

To serve
Iceberg lettuce leaves
1 tbsp chili sauce

Method
Shred the pak choi into thin strips and slice the mushrooms, spring onion and carrot into thin batons.
Heat the oil in a small frying pan and add the chopped vegetables along with a handful of beansprouts.
Drizzle over the soy sauce and stir fry very quickly for no more than 2-3 minutes, until they have started to soften but are still crisp.
Carefully peel a couple of leaves off the outside of the lettuce and lay on a plate.
Divide the vegetable mixture between the lettuce leaves and roll/fold them up to form parcels.
Serve at once with chili sauce to dip them in.

Tuesday 20 March 2007

Biscuits for Mothers Day

I made these batches of biscuits to send home for my Mum for Mothers Day as I wanted to send her something homemade rather than sending a standard bunch of flowers.

Cinnamon & Spice Swirls
(Adapted from Rachel Allen in Good Food Magazine)
I invented these cinnamon & spice swirls as my Mum loves those cinnamon pastry swirls that you can buy from bakeries and I wanted to see if I could replicate them in biscuit form. I found a basic stable biscuit recipe and then rolled it out thinly before sprinkling over the flavours and rolling it up to form the swirls. I am pleased to say they turned out well, maybe not as strongly spiced as I would have liked but tasty nonetheless.

Ingredients
175g plain flour
110g butter or margarine
60g caster sugar
½ tsp cinnamon
½ tsp mixed spice
2 tsp extra caster sugar

Method
Place the butter, sugar and flour into a mixing bowl and cream together until it starts to form crumbs.
Then bring the dough together using your hands.
Roll out the dough to 5mm thick between two sheets of cling film (it prevents it sticking to the work surface). Try to make it as square in shape as possible.
Remove the top sheet of cling film and sprinkle over the spices followed by the extra sugar.
Using the cling film to help you, roll up the dough as if you were making a swiss roll. You should end up with a long thin sausage shape.
Wrap in cling film and place on a tray in the fridge for 10 minutes to firm up.
Meanwhile, heat the oven to 180C.
Remove the dough from the fridge and carefully unwrap the cling film.
Using a sharp knife cut 5mm thick slices and place them flat onto a dry baking sheet.
Bake in the oven for 15-20 minutes until just turning golden.
Allow to cool on the tray for 5 minutes before transferring to a cooling wrap.
They will still be a little soft, but they crisp up on cooling.

Makes 24 biscuits.


Simnel Marzipan Mounds
I created these biscuits in the hope of replicating a traditional simnel cake in a more post-able form. They have the same dried fruit mix and spices added to the biscuit dough as the cake and also have a small disc of marzipan baked into their centre. I used Rachel Allen’s basic biscuits recipe again for these biscuits, only this time I halved the recipe and added the dried fruit and spices to the dough. Adding the disc of marzipan can be a little fiddly and when they bake the marzipan can sometimes burst out of the top, making them not the most attractive biscuits to look at but the flavour is defiantly worth it. The marzipan stays soft and moist and the fruit really makes these biscuits taste like simnel cake. Yummy.

Ingredients
80g plain flour
55g butter or margarine
30g caster sugar
¼ tsp mixed spice
25g currants
25g dried apricots
15g glace cherries
55g marzipan

Method
Place the butter, sugar, mixed spice and flour into a mixing bowl and cream together until it starts to form crumbs.
Then finely chop the dried apricots and glace cherries and add to the crumb mixture along with the currants.
Using your hands, bring the mixture together and form into a ball.
Divide the dough into 12 equal pieces and flatten each one into a rough round using the base of your hand.
Take a marble sized piece of marzipan and roll it into a small ball before flattering it slightly to form a disc.
Place this disc into the centre of the flattened dough and draw the edges of the dough up around the marzipan. Turn the dough over the flatten it gentle to close up the seams.
Place the doughy mound on a dry baking sheet and repeat with the leftover dough.
Bake the biscuits in the oven for 20 minutes until lightly golden brown.
Allow to cool for 5 minutes before transferring to a cooling wrack and leaving to cool.

Makes 12 mounds.


I then packaged the biscuits into cellophane bags and added little labels before posting them home. I was very pleased to hear that they survived the post very well.

Friday 16 March 2007

Mothering Sunday Simnel Cake

Simnel cake is a light fruit cake that has a layer of marzipan baked into the centre and an additional layer added on top after baking. This cake is now often thought of as an Easter cake and yet it was traditionally made by girls in service to give to their mothers on Mothering Sunday as they were allowed this day off as a holiday.
I have always known a simnel cake to have 11 marzipan balls arranged around the edge which are meant to represent the 12 disciples, minus Judas who was a traitor. However, thinking about it now I suspect that this is an Easter addition and that the original Mothering Sunday simnel cake would not have had these. Nevertheless I have added them to my cake.

I decided to make this cake for Chris’s mother as she has invited me over for lunch with her family on Mothers Day. I usually also bake one for my own mother but as I am at university and away from home I am not sure how well it would survive the post, but I did send her something else instead. (Post to follow shortly)

I love this cake and often make it (minus the extra marzipan topping) throughout the year. The middle layer of marzipan adds a wonderfully moist layer to the centre of the cake and provides a great almond flavour. You can add a wide assortment of dried fruit to the cake and I see no reason why you shouldn’t experiment with adding more exotic fruits such as dried blueberries, pineapple, mango or cranberries to get a different flavour. However, the recipe below uses the more traditional fruits.

The cake is meant to be placed under a hot grill or gently blowtorched to allow the marzipan decorations to become a pretty mottled golden brown. However, my house at uni only has a very small external grill which the cake wouldn’t fit under and as I have no blowtorch the cake has had to be left natural. I am sure it will be just as tasty though.

Simnel Cake
(Recipe adapted from Mary Berry's Ultimate Cake Book)
Ingredients
175g light soft brown sugar
175g butter
175g self raising flour
3 eggs
25g ground almonds
2 tbsp milk
100g sultanas
100g glace cherries
100g dried apricots
100g extra dried fruit of your choice e.g pears, peaches, prunes, cranberries or raisins
2 tsp mixed spice
½ tsp cinnamon
250g marzipan
2 tbsp apricot jam
1 extra egg

Method
Preheat oven to 160C. Grease and line the base and sides of a deep round 20cm cake tin.
Measure out the sugar, butter, flour, ground almonds, spices, milk and eggs into a large mixing bowl.
Beat everything together using an electric whisk until you have a smooth batter.
Weigh out all of the dried fruit and chop it into small pieces using a pair of scissors.
Add to the cake batter and beat everything together again for a few seconds. Roll out about 1/3 of the marzipan until around 4-5mm thick. Using the base of the cake tin as a measure, cut out a circle using a sharp knife.
Place half of the cake mix into the cake tin and top with the disc of marzipan.
Cover with the remaining cake mix and smooth the surface, adding a little dip in the middle to compensate for the cake rising.
Bake in the oven for 1 hour before covering quickly with a layer of foil to prevent it from going too brown. Then allow to bake for a further 30-45 minutes until firm and springy when gently pressed.
Remove from the oven and allow to cool in the tin.
Once cool, remove from the tin, discard the lining and place onto a serving plate.
Roll out half of the leftover marzipan (1/3 of the original weight) and cut out another disc as before.
Heat the apricot jam in the microwave with 2tsp water until syrupy.
Brush the top of the cake with a little of the jam and top with the marzipan disc.
With the remaining marzipan, form 11 marble sized balls and place around the top of the cake in a ring at regular intervals. Attach them to the cake using a little jam.
If desired the cake can now be brushed with a beaten egg and place under a hot grill for 4 minutes until tinged golden brown on top.

Sunday 11 March 2007

Chatsworth House Walk

I am a member of the universities walking club and we go on walks most Sundays, usually around the peak district. However, today we thought we would have a change and do a bit of historical sight seeing and so we are hopped on bus to Baslow and explored the grounds and surroundings of the magnificent Chatsworth House. Click here for the official site. Here’s a picture of some of the club members, strolling through the grounds.

I have visited it once before, again with the walking club, in the depth of a very bleak and cold January the previous year. It was much more enjoyable today with the sun shining and only a cool breeze blowing. You only have to walk a short distance through the village of Baslow and down a little track and then suddenly, wham, the house just appears from behind some trees, looking like its miles away from anywhere. You are free to enjoy the grounds and if you are lucky enough you may even spot the odd deer and obligatory sheep.

We spent the day doing a large circle of the house by wandering through some fields (getting good and muddy) and along some woodland paths. In fact we explored one particular stretch of fields rather too thoroughly, thanks to our 17 year old map!!! We only discovered it was so out of date when we came across a very tall wall blocking our path that wasn’t shown on the map and causing our supposed ‘shortcut’ to turn into a scenic detour. But the views were worth it.

I was amazed to discover that in the more sheltered parts of the woodland there were large patches of Snowdrops. I think they look so pretty nestled among the fallen branches. At one point we left a woodland path and were confronted with a very tall and unusual tower that overlooked the back of Chatsworth House and was surrounded by cannons. It must have been some sort of lookout tower and was most impressive.

We cut back down to the house and walked back through the grounds and back to the bus stop. We had to wait over an hour for our bus to turn up. It wasn’t that we missed the first bus and had to wait for the next one, it just turned up 45 minutes late. Still, it was a great day and lovely to walk with a group of likeminded people, who don’t care if you are all splashed with mud and look like you have just been pulled through a hedge backwards.

Saturday 10 March 2007

Sweetcorn Fritters

I had some leftover sweetcorn that had been lurking in the back of my fridge for far too long, so I decided to turn them into fritters. These are really quick and easy to make and are a great way of using up a wide variety of leftovers. Canned or defrosted frozen sweetcorn works well for this recipe, however, if using canned then try and drain away as much of the liquid as possible as you don’t want the batter to be too wet.

These fritters make a good lunch time meal or light supper. They are lovely eaten hot straight from the pan, or they can be eaten cold as a snack. Serve them with a salad of your choice and some kind of sauce. Tomato salsa works well when they are hot and cream cheese and sun dried tomato paste or guacamole both work well when they are cooled. You could also make these fritters in miniature for a party or picnic, by using a teaspoon instead of a tablespoon.

I added a small finely chopped red onion to the batter this time to add some extra colour and flavour. Spring onions or finely chopped chili are also great. I am sure a little ham or cooked bacon would work equally well too.

Sweetcorn Fritters
Ingredients
50g plain flour
1 egg
A little milk
3 tbsp canned or frozen sweetcorn
1 tiny red onion
¼ tsp ground pepper
Oil for frying

Salsa or guacamole to serve

Method
Turn the oven to a low temperature and place a plate inside to gently warm up.
Finely dice the red onion and add to a mixing bowl along with the sweetcorn.
Add the flour, pepper and egg. Beat everything together to form a thick paste. Add enough milk to produce a thick spoonable batter.
Heat a little oil in a frying pan and add small tablespoons of batter to the pan. I find I can usually get three fritters cooking at once.
Allow them to cook for 1 minutes before turning over with a pallet knife and cooking for a further minute.
When golden brown on both sides, remove from the pan, drain on kitchen paper and place in the oven to keep warm while you use make the second batch of fritters.
Serve hot or allow to cool before wrapping in clingfilm and placing in the fridge until required.
Serve with the accompaniment of your choice.
Makes about 7-8 fritters.

Tuesday 6 March 2007

"Divine" Chocolate Torte

I wanted to make some kind of dessert to take round to Chris’s the other night as he had invited me over to watch a film. As he is the biggest chocoholic I know, something chocolaty was the obvious choice. I had a rummage though my recipe books and old cookery magazines and came across this recipe from an old BBC Good Food magazine. It appealed to me as it contained whipped egg whites meaning it produced a lighter torte than the more denser versions. After a few quick ingredient alterations I set about creating the torte. It was very easy to make and was setting in the fridge within the half hour.

I found that the torte didn’t require any time out of the fridge before being suitable to serve, due to the addition of the egg whites which kept the whole dessert light and moussey. We cut slices and eagerly picked up our forks. The forks sank effortlessly through the thick moussey layer and taste and texture was gorgeous. It just melted away on your tongue, all smooth, creamy and incredibly chocolaty while still being light and airy. Big indulgent grins spread across our faces and Chris pronounced the torte as being “divine.” Praise indeed from such a chocoholic.

Chocolate Velvet Torte
Ingredients
9 digestive biscuits
45g butter
2 egg whites
75g caster sugar
200g dark chocolate
250ml double cream
1 tbsp brandy

Method
Place the biscuits into a freezer or sandwich bag and bash them with a rolling pin until you achieve fine crumbs.
Melt the butter in a medium sized bowl and then add the crushed biscuits. Mix well until all the crumbs are buttery and then quickly press the mixture into the base of a deep 7inch loose bottomed cake tin. Pat down with the back of your hand.
Place the tin in the fridge to set while you prepare the filling.
Place a mixing bowl over a pan of simmering water (making sure the base doesn’t touch the water) and whisk the egg whites and sugar for about 5 minutes, until a thickened glossy meringue mixture is achieved. Remove from the heat.
Melt the chocolate in the microwave and meanwhile whip the double cream and brandy together until it just reaches the soft peak stage, you don’t want it too stiff.
Fold the melted chocolate into the meringue mixture, followed by the softly whipped cream.
Pour the chocolate moussey mixture into the tin and smooth the surface.
Cover with foil and leave to set in the fridge for a minimum of 4 hours or preferably overnight.
When you want to serve it, run a warmed knife around the inside of the tin to help release the torte. Unmold and serve immediately with a little extra lightly whipped cream if desired.

Monday 5 March 2007

They’re Waffley-Versatile

Last week I bought a Belgian waffle maker, something I have had my eye on for many months. This one was in a closing down sale and so naturally I couldn’t resist it. I brought it home with excitement and being my over-confidant self I didn’t bother reading the recipe provided, feeling sure I could easily make up a suitable batter. Once I found out the basis of how it worked, I made up a batter mixture, including a mashed banana, (perhaps a little over adventurous for a first attempt), but I was sure it would work. I heated the machine up, poured in my batter and shut the lid. It started to sizzle and give off the most gorgeous banana smell. I licked my lips in anticipation and opened the lid. I was greeted with a sticky gooey mess. The outside of the batter had browned and stuck like glue to both metal plates and the middle was still uncooked. I tried to pries the batter off the pates but it stuck fast and set like glue. I ended up having to pour hot water over the plates and leaving it to soak before I could pries the batter off. Hmmm, lesson learned, I should have read the recipe.

I tried again the following morning, this time using the recipe provided in the instructions booklet to great success! The process involved separating an egg and beating the egg white to soft peak stage before stirring it in (I wouldn’t have thought of doing that.) The waffles were wonderfully light, crispy on the outside and soft in the centre. They didn’t stick to the plates or tear in half. I felt a great sense of achievement after my original disaster and happily tucked into the waffles. I chose to play it safe and make vanilla ones this time but the huge variety of toppings you could add to them is endless. I think I will try adding a few chocolate chips to the batter next time. Whatever your chosen flavour, they’re certainly waffley-versatile!

Waffles
Ingredients
1 egg
60g self raising flour
55g butter/margarine
50g caster sugar
½ tsp vanilla

Method
Set the waffle maker to heat up while you make the batter.
Melt the butter and then stir in the sugar. Separate the egg and beat the egg yolk and vanilla into the butter/sugar mixture.
Whip the egg white until fluffy and starting to form soft peaks.
Gently fold the flour into the butter mixture before folding in the egg white.
Carefully pour some of the batter in the waffle maker, allowing room for spreading.
Close the lid and leave to cook until golden brown.
Remove from the waffle machine straight away and serve with the topping of your choice.

Makes 4 waffles

Sunday 4 March 2007

Pizza Time

I love pizza and unless you are going to a nice Italian restaurant I find making your own is far tastier than any of the frozen ones you can buy which often taste like they have cardboard or Styrofoam for bases. Making your own pizza is fun and very satisfying and it doesn’t take as long as people expect. You can even make the dough he night before and leave it in the fridge overnight if you don’t have time to start from scratch on the day you want to eat it.

I must confess that I did cheat slightly when it came to the tomato sauce and bought a jar of tomato pizza topping but whenever I make my own it always turns out too wet and makes the base soggy so I thought I would play it safe and cheat slightly.

A pizza has the same kind of attributes as a sandwich, in that it’s the bread dough base which makes it a pizza, but what you top it with is up to you. I added red onion as I like the crunch they give and I think they have a much sweeter and nicer flavour than white onions. They also add great colour. One thing I do think is important though is to use mozzarella for that great stringy quality.

This pizza was delicious, with a crisp crust that was still slightly soft and chewy in the middle, just how I like it. Cold pizza make great leftovers for lunch the next day.

Mushrooms, Sweetcorn and Red Onion Pizza
For the pizza dough
10g fresh yeast
175ml warm water
½ tsp caster sugar
125g strong plain flour
¼ tsp salt
½ tbsp olive oil

For the topping
½ jar tomato pizza topping
1 small red onion
3 mushrooms
2 tbsp sweetcorn
½ fresh ball of mozzarella

Method
Crumble the yeast into the warm water, add the sugar and stir until it has dissolved. Leave to rest for 5 minutes.
Place the flour and salt in a large bowl, and pour in half the water mix and start mixing together with your fingers, shaped into a claw. Add the olive oil and combine. Keep adding water until you have a soft dough, you may not need it all.
Put the dough onto a well-floured surface and sprinkle with flour. Knead the dough until it becomes elastic, around 5 minutes.
Place the dough into a lightly greased bowl and cover with cling film. Leave to prove in a warm place for 30minutes or until it has doubled in size.
Meanwhile, peel the onion and slice it into fine rings and slice the mushrooms. Drain the mozzarella, pat dry and finely slice into rounds.
Preheat the oven to 220C. Knock back the dough and roll it out on a floured work surface until thin and rectangular in shape.
Place the dough onto a lightly floured rectangular baking tray and spread on the tomato sauce and scatter over your chosen toppings. Distribute the mozzarella over the top.
Bake in the oven for 20-25 minutes, until golden brown and crisp.

Serves 2

Thursday 1 March 2007

Butterbean and Sweet Potato Salad

I fancied making something using the sweet potato I have had in my cupboard for the last couple of days that would also provide me with some quick lunches. I chose to make a butterbean salad along with some extra veg to add colour and flavour.

This was really quick and easy to make and the colours all looked very attractive together, the pearly white of the beans, with the deep orange of the sweet potato and bright green of the peas. The cumin in the dressing complemented the sweet potato well. I had some for lunch today and I think it tasted even better than when I tasted it last night. The flavours have had time to mingle and mellow, so I would advise making this a few hours before you want to eat it and keeping it covered in the fridge.

Butterbean and Sweet Potato Salad
Ingredients
410g can butterbeans
1 medium sweet potato
1 red onion
1 carrot
50g frozen peas
1 tsp vegetable oil

Dressing
1 tbsp olive oil
2 tsp balsamic vinegar
1 tsp lemon juice
½ tsp ground cumin

Method
Put a pan of water onto boil. Peel and chop the sweet potato into 1cm cubes.
Add to the pan and cook for 13 minutes before adding the frozen peas and cooking for a further 2 minutes until tender. Drain and leave to cool.
Meanwhile peel the red onion. Cut it in half lengthways and then slice it finely.
Heat a small frying pan with the vegetable oil and fry the onion until soft.
Drain the butterbeans and rinse them in cold water. Place into a container and grate over the raw carrot.
Add the fried onion, sweet potato and peas.
Put all the dressing ingredients into a small bowl and mix together.
Drizzle it over the salad and toss together.
Great eaten on its own, or in a tortilla or pitta bread with lettuce and a thin spread of hummus.

Note: I think it would also be nice with some freshly chopped coriander stirred through, but I didn’t have any at the time.